The deployment cycle is weekly/bi-weekly depending on the requirement/urgency/severity of any bugs discovered and fixed etc. With this frequency we decided to semi-automate the process so that the person performing the task don't have to manually issue the commands and make the whole process smooth. Link to the scripts are at the end of the post.
The folder contains the following files
AOSClientRegFiles:
The folder contains the following windows registry files
The first file changes the AOS configuration to a configuration named "Maintenance" and second one changes back to Original. The next two files do the same thing for the client configuration. This is done by merging these files in windows registry. Step 3 & 5 use these files.
StartStopBatch:
This folder contains the files that either starts or stops a windows service on a server remotely.
Step 1 & 6 uses these files.
This file contain the details of the services that needs to be stopped/started as part of the import process. The file format is
 1:AX6AOS1:AOS60$01
 2:AX6AOS2:AOS60$01
 3:AX6AOS3:AOS60$01
Each server is on a new line. The file uses : as delimiter. The first field is used for ordering only. The second field is Server Name and the third is Service Name. These don't need to be AOS services only. In fact any service can be stopped/started.
cImportExportConfig.txt:
This file contains the settings for the import process. The contents of these files are
 AOSNAME:AxTest
 DATABASESERVER:SQL2008\SQL2008
 DATABASENAME:AxaptaDB
 IMPORTMODELSTOREFILENAME:AX6AOS01.axmodelstore
 EXPORTMODELSTOREFILENAME1:AX6AOS1_AxTest
 EXPORTMODELSTOREFILENAME2:.axmodelstore
 TEMPSCHEMANAME:AXTempSchema
Step 0 & 2 uses this file.
Step 0:
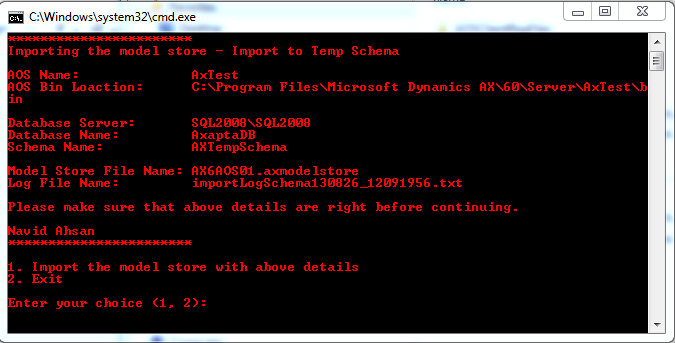
This step import the model store in a temporary schema. The reason this step is zero is that it can be performed before the actual import task is carried out. The script reads the setting file cImportExportConfig, presents the user all the details and asks to enter the choice as shown below
If the user enters 1. The batch file then imports the model store into the temporary schema. A log file is generated in the bin folder of the AOS.
Step 1:
This step stops all the services specified in the file cAOSServerConfig as shown below
The scripts stops each service independently and in parallel. The script stops the service and then waits until the service is stopped after which it displays the confirmation. In above case if 4 is entered, 3 different batch process runs each stopping the individual service.
Step 2:
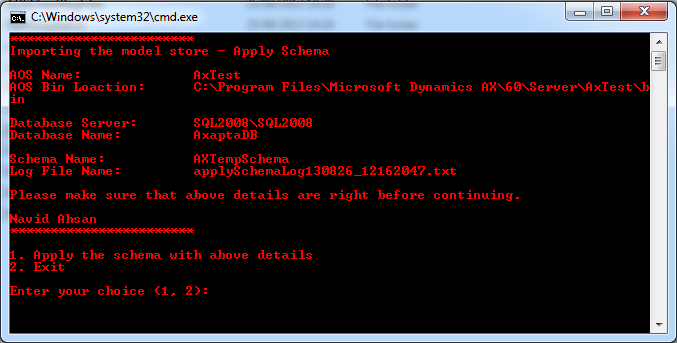
This step applies the model store to the actual schema and in the process creates a log file in bin folder of the AOS as shown below
Step 3:
This step changes the AOS configuration to maintenance. The same is done for the Client configuration. These configuration should already exist. If the configuration names are different than these can be changed in the files by using notepad.
Step 4:
This step just start the AX Client to perform additional step (like synchronisation, report deployment etc.). These step are not automated but can be done.
Step 5:
This step changes the AOS and Client configuration back to original.
Step 6:
This step uses the file cAOSServerConfig and starts the services as shown below.
As with the stop script, this will start the services in parallel and wait for the service to start before displaying the confirmation.
Note: The scripts should be tested in a test environment before using them in production. The user should have all the necessary permission to perform different task remotely on a server.
This posting is provided "AS IS" with no warranties. Use code at your own risk.


No comments:
Post a Comment